Here's the first series of posts for you to see what my house looks like. This is our home. No, its not always this clean, but I have learned a few things along the way to help it stay this way most of the time. I don't stress about it being clean - I just do it. Most importantly - I'm raising a toddler who really does an awesome job at picking up after herself. So, much of the cleanliness is owed to Peyton. Also...have I mentioned that I have an amazing hubby? Dan cleans up all the time as well. I will be sure to post pictures as well of what the house looks like on a 'not so good day'... we definitely have those and I'm to share them as well.
I try to add some of the details for you when I complete a project within the posting, but just email me if there is something specific you want to know. I'd love to hear from you. I'll post the paint colors and places I commonly shop for items on my FAQ page.
OUR NEST: CURB APPEAL
BEFORE
You couldn't even see the house as you approached it with all those bushes.

BEFORE
You couldn't even see the house as you approached it with all those bushes.
The brick colored garage door and the flesh colored exterior paint weren't doing much to help the house out. This 1954 rancher needed some lipstick!


AFTER
Garage door, exterior and trim painted.


The front door even got all dressed up!

We added tall grasses, hostas, lavender and burning bushes, as well as a japanese maple tree for the front landscaping - low maintenance and so pretty! New pictures to come this summer.Now that the landscaping is more established it already looks 10x better!

I also painted the hand rails. I painted the trim around the windows in two colors. Saffron Ivory by Valspar is the inside color and Lindhurst Stone by Valspar is the exterior color and the color for the outside trim piece. The door is painted with a high gloss factory red paint by Valspar (find factory colors in the spray paint aisle). The railings were also painted with a factory black - as was the garage door and shutters (all painted with high gloss black).
THE LIVING ROOM
BEFORE
Actually this is even nicer than it was originally. It had brown 50 yr old shag carpet and dusty, disgusting, nasty, gross (did I say nasty?) curtains and gold curtain rods.


THE LIVING ROOM
BEFORE
Actually this is even nicer than it was originally. It had brown 50 yr old shag carpet and dusty, disgusting, nasty, gross (did I say nasty?) curtains and gold curtain rods.
AFTER


Homemade wall art that changes weekly or daily. It's just a piece of leftover plywood that I painted up with chalkboard paint. We take it off the mantel and put it on the coffee table and practice our ABC's and numbers with our daughter.
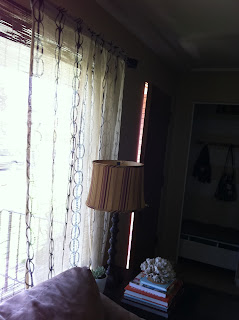
Living room in progress...

I would love to get new curtains and a new dark leather sofa. I'm eyeballing this leather sofa from Overstock.com and love these curtains from Ikea (see following images)


UPDATE: I bought new curtains! $29 for 2 panels. Yeah!!!
Notice the wall behind the couch?

And.... This is what it looks like now. No more closet door and no more bare walls!


Our picture wall. I was SO inspired by younghouselove.com when I saw their blog. They did an amazing photo gallery wall in their new house and in their first home as well.
I want to mount the TV above the fireplace and get an area rug for the space. In the mean time, I feel blessed and the way my house is for now puts a smile on my face, my hubbies face and the kiddos have pretty adorable smiles too!


The other thing we want to do to this space is knock out that red tile and replace it with our left over travertine from our kitchen back splash project.
DINING ROOM
BEFORE
I actually dont have any before pictures with the old nasty chandelier. Darn.
 There's the old unpainted fireplace and fireplace screen again.

BEFORE
I actually dont have any before pictures with the old nasty chandelier. Darn.


View from the living room
For a list of where the items where purchased please see my FAQ tab.

View from our kitchen
That chandelier is from West Elm. Purchased in May of 2009. They still have it there. It's a great splurge! My favorite item in my house! Well no... my daughters art work has to be #1 of course.

Another picture of those tissue paper poppies I just made out of tissue paper. Again - look at that Capiz Chandelier! Amazing right!

And one more look. Think I like them much?

The frames are from IKEA. The curtain hardware is from Lowes and the curtains are from Target. I love using metals in my house and this combination next to our slider doors really adds a whole new sparkle!


Two accessories that always seem to be in the dining area. Whether they're catching flying food and crumbs or snoozing - our Weimaraner and Boxer sure do know how to utilize the dining room.
UPDATE: We no longer have dogs. They have moved onto new homes. I'll dedicate my next blog to them. We love and miss you Aussie and Kiyah!
UPDATE: We no longer have dogs. They have moved onto new homes. I'll dedicate my next blog to them. We love and miss you Aussie and Kiyah!

I painted our 7 year old WalmartD.I.Y page. Hoping to get a few more years out of them. There weren't chair pads on them before either - those were a nice discount find from Costco as well. I got the set of 4 chair pads for $20.

I love that I can see my daughter playing on her swing set in the back from my kitchen or living room. See her neato orange strider bike in the background? That was her 2010 Christmas present from her Grandmas.The dining table is a $40 craigslist find. We passed on the old table to my Mother-in-law.

Last view of the dining room. This picture was taken from our kitchen and this has to be my favorite photo of the dining area hands down. I hope you've enjoyed the space. It was so ugly before. There were 1950s retro globes hanging in place of the West Elm chandelier and brown 1950s shag carpet throughout the first floor. The curtains hanging over the sliders were also 1950s and when I took them down I seriously think I ingested a pound of dust and spiders. It was nasty with a capital N!
THE KITCHEN
BEFORE
(actually it was even worse! The fridge and oven were yellow and the chandelier wasn't there yet)

AFTER

ANOTHER BEFORE SHOT

AFTER


Next on the TO DO list will be the kitchen floors. We want to go with hand scraped antique floors. We're actually planning to find old rustic wood for free on craigslist that we will use. Goal - Done by August 2011!


EVAN'S NURSERY
Before - Cramped Guest Room

AFTER
Baby Evan's Nursery
Baby Evan's Nursery


MASTER BEDROOM
BEFORE
BEFORE

There were 60 year old curtains in the room and really dirty walls. With a little elbow grease, and some paint the room now looks like this....
AFTER


All the frames are from Ikea. The most expensive one was $9.99 I believe. The wall color is Dolphin Fin by Beher in Flat and the blue accent at the top is a mix of sample paints that I created. The throw is an Ikea find as well for $12.99 and the toy box at the end of the bed is now painted for my mini mudroom makeover.


This is the last piece of the makeover for me to complete. I've painted all the trim and baseboards white now I just need to find a long 6 drawer dresser thats not too deep that I can paint white. This dresser is an heirloom of my mother in laws so it has to stay this way. Once I find the dresser it will go where the mirror is and then the mirror and a sitting chair will be in the closet for a mini sitting and dressing area.

OMG! You are a decorating diva! I love what you did with the entry closet and the kitchen! I'll have to have you over to give me some ideas on our place :)
ReplyDelete~ Your hopelessly envious neighbor - Brooke :)
Aw, Thank you Brooke!
ReplyDeleteEXQUISETTE. I am so inspired, cannot wait to read more.
ReplyDeleteLindsey- thank you so much! Your feedback means a lot. So sweet to say!
ReplyDeleteEnjoyed your blog! Great ideas!
ReplyDelete