Thursday, May 26, 2011

Vegetable Gardening: Let the Plot Begin!

UPDATED! The vegetables are growing. Yeah!
I am so excited about our vegetable garden going in this summer. I worked my booty off this past week putting in garden beds - pulling out a ton of sod, leveling the ground, moving huge boulder rocks and planning out where all the 2x6's would go. I even used my hubbies miter saw and LOVED it. For some reason I always let the hubs use the miter saw on our past projects. What was I thinking??? That thing is AWESOME (sung in an opera voice).
I decided to put the garden smack dab in front of our deck so when the morning breeze hits and I'm sitting out there, I can smell all my veggies, just waiting to be picked. We have a little patio area off the back deck that will now be right in front of the garden. So without further ado, here is what happened over the last 4 days. I put Evan in the pack and play outside when I could and then worked during the kids nap time. It was so hard but I am SO excited to get planting now!

BEFORE
Round flower bed be-gone! What was the previous owner thinking?


AFTER
 

 HOW IT ALL WENT DOWN....
There were huge boulders around the circular flower bed. Apparently they needed to remind me that I turned 32 this year - I no longer recover quickly ha! What you cant see in this photo is how uneven the area is. There was about a 5 inch slope down where the rocks were.
 Yes the view is kind of ghetto - the tarp was our attempt at keeping the weeds down. Bahahaha!

THE PLAN: 2 6x8 beds and a big 12x4 bed in behind them...
 
but first we had to move a ton of rock -
 
Dan and our little helper, Peyton, moved it in her wheel barrow to our rock garden area. She insisted that we use her wheel barrow. How could we resist?


Progress. We used free wood so this projects total cost was...$0 YEAH!!
Yes - some of that is Trex decking and it was all given to us by my rad neighbor. Shout out to Jack. Thanks Jack!
 
I cut the sod out so the boards sit just about 2 inches in the ground. In some area where the ground was really level they sit about 3 inches in the ground. To make sure that no grass tried to move into the garden beds I used left over edging I had from our front landscaping project. I put it in 5 inches below the grass roots. That knife is what I used to cut all the roots away from the grass as I pulled the sod back.
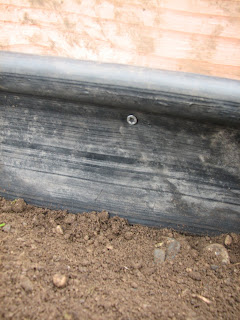
 In this picture you can see the bed liner - I did this all the way around the inside of the beds.
 Grass be gone and don't even think about trying to grow in here!
next, I screwed the bed liner to the 2x6 so that the grass would have no way to push up the bed liner when it tries, oh so hard, to grow where it shouldnt. I thought this step was pretty darn clever, if I do say so myself.
The final product was worth all the hard work. We put the netting up for a few weeks to keep the robins out. They were drooling over all the worms! It worked. Our seeds have all sprouted and now the netting is off. Here's what it looked like with the netting
 

FINAL AFTER SHOT

The honey comb in lay in front of our deck is pretty cool. I found it hidden under grass that had grown over it. Who knows how long it had been hidden away. The last owner apparently never went outside. From our deck to the lawn we have a 16'x4' patio with this honey comb cobble stone stuff (not sure what to call it?). I want to put a little table and 2 chairs down here so that I can sip my lemonade and eat sun ripened tomatoes in the warm sun. Doesn't that just sound dreamy right now? Now if only the sunshine would come out.

Some inspirational garden scenes to ponder....
 
Image via www.re-nest.com
Now thats a Green House. Wow!

 I like this drawing of a garden here. We plan to have a similar layout with sugar snap peas growing up the backside of both the beds and then tomatoes growing up trellises in the very back garden bed.

 Image via apartmenttherapy.com
We will have lots of lettuce indeed, and because we can access the beds from all sides I plan to put them close together to leave little room for weeds to grow.
Next 4 images via ewainthegarden.blogspot.com
 I love flowers she incorporated into the garden beds and that river rock is amazing between the beds too.
 I plan to border the very back garden bed with Lavender. I loev the colors in this bed - the lettuce combined with the purple lavender is amazing!
And here's another photo idea I loved... a trellis for the peas to climb up made out of twine, but even better - look at how she covered the soil with straw. I bet they don't worry about weeds. Awesome idea!
 One last cool idea to leave you with....Lettuce in a wheel barrow. Why didn't I think of that? Such a neat idea! You could put some nasturtiums in a wheel barrow too for a pop of color.


Wednesday, May 18, 2011

Bathroom Makeover Wish List

We have our sinks, faucets, the mirror and the paint. Now all we need is the right table or slab of wood that will be our vanity and we're set. Here are a few images that are inspiring me as I get ready for our bathroom remodel. My budget for the project was $100 and I've successfully stayed on budget. Whoop Whoop. I can't wait to reveal the final pictures!
 Bathroom Makeover Wishlist:
Wishlist #1: Rustic dark wood floors with a painted pattern like this.
It will be sealed of course. Yes, you can do wood floors in your bathroom. Check out the new 2011 HGTV Dream Home Master Bathroom. They did hardwood floors in the master bathroom - amazing!
I have no idea of where this image came from. Does anyone recognize it? Id love to give them props but I've had it saved in a desktop folder for ages. 
Here's the image of the 2011 HGTV Dream Home too. How cool are those floors!

 Wishlist Item #2: A big chunky mirror to go over our double sinks.
I may end up using the mirror I scored on craigslist for $30 that I spray painted.
This images is via HGTV.com from their Dream House

Wishlist Item #3: A yellow vanity with warm gray walls.

What's not to love about this room? Photo via Three Men and a Lady (windhula.blogspot.com). I'm going with this color theme. Its been a favorite of mine for about 3 years and it's still going strong out there. I'm going to paint my vanity yellow like this and the walls will be grey. My shower curtain is currently the colors of that DIY painting she did.I think these colors would look AMAZING with those wood floors too.

Wishlist Item #4: Gooseneck Barn Lighting (2 of them).
 
Image via countryliving.com
Love the red gooseneck barn lights. What a great makeover.
I just bought the Foto Ikea pendant to go over our kitchen sink. Maybe I could jerry rig something from the wall kit to the pendant that goes over the cord to make it into a gooseneck? For only $19.99 it may be my best choice. I'll be scoring antique shops for an original in the mean time.
Image via ikea.com


Wishlist Item #5: Rustic wood pallet wood framed mirror.
If I'm not feeling the spray painted mirror for the bathroom, then I'm for sure feeling this mirror.
Image courtesy of a House Crashing project over at younghouselove.com 
I have a few wall length mirrors that were on the walls in our home when we bought it that I want to re-purpose. I just don't want my bathroom to feel like a forest. With wood counter tops, a wood floor and a wood framed mirror it could go that way so I know I have choose wisely. One can drool though...How cool is that IKEA light there!

Wishlist item #6: Recycled wood counter top. Large driftwood piece or reclaimed barn wood counter to be exact.
 
Image via House Beautiful
Or heres a picture of a bathroom vanity made from an old table....
Image via myhomeideas.com
If I went this route then I would paint the legs yellow like the dresser above that I mentioned and find fabric to coordinate that would hide the plumbing. Of course I'd love to find a table like this with the drawers or maybe have Dan make something like that, but I do have a time line for the project and I want need it to be free. Psst....Notice the painted hardwood floors in the picture?

Give me one month and this project will be done. I'm just waiting for the right table to pop on craigslist for FREE! Yes, free! Since I have been looking forever for barn wood in this size or a piece of drift wood this size (yeah right) and have had no luck, I'm going with an old table top. I may even use half the table - keep the legs on it and just put a cool piece of fabric under the counter to hide the plumbing and my storage bins. In the mean time a buddy of ours has offered us an 8 ft long butcher block counter and since I'm thinking of going this route, I was wondering how butcher block would look if I beat it up a bunch and sanded the edges to smooth rounded edge. 

What do you think? Could I pull off a counter like this with a butcher block piece?

Fairwell Kiyah & Aussie

This is a sad blog post for me. It's two fold...I'm happy to have healthy happy kiddos that arent struggling with allergies in their own home anymore, but sad to be a dog free home now. My husband hasn't had to use his inhalor for a week now so that's a praise, but he is also tearing up with me in the tiny moments we have alone and really miss the dogs. Here are a few pictures of our adorable, precious dogs. We had these babies for 7 years. They will be missed. I will say - having a home with no dogs has its perks indeed, but I don't even want to discuss that right now...this blog is dedicated to two cool dogs that will be forever missed. Kiyah and Aussie - We Love You! - Dan, Heather, Peyton and Evan

Snuggle buddies. They only had one dog bed and had been together since 8 weeks old. Just like sisters!
Our daughter Peyton shared some great memories with them. Such a sweet moment.
I had lots of little moments with them as well. Here's a picture of Kiyah and I when she was about 3 y.o.
 
Australia, or better known as Aussie
 Kiyah
 
Both dogs have moved on to new homes. They will be missed but the right decision was made and I just wanted to give them a special little space in blog land...

Saturday, May 14, 2011

To Stripe or Not to Stripe?

I love Washington. It was such an amazing day. We spent almost all day outside, so when I came inside and saw my newly made over mudroom closet I was SO happy to have a place to sit down and take my shoes off. YEAH! My daughter loves to just sit on the bench and cuddle her baby doll. I feel most proud about the project when I see her all cozy on that bench.

So today I have a favor to ask of you....
Our hallway is feeling a little plain to me today. I just asked the hubs what he thought about painting stripes down it. Big horizontal stripes. Like 14 inch stripes, so really there would only be like 4 stripes. I'd paint them in my favorite white that I've used on our cabinets, chairs and one of the fireplaces - Lotus Flower. He said "Go for it babe, you know what looks good. I cant picture it in my head".... I love this man, but I need some input on this one. Do you think it would make the hallway look too theme parkish? Is that even a word? I'm not going for a fun house here....just something to modernize the space. I took down all the picture frames but I won't hurry the process. I'll wait for some feedback so please, let me know what you think. Thanks!
Here's our hallway now
 
 I want to paint all the doors white and spray all the hardware on the doors dark brown or black. At the end of the hall we have yet another storage closet. There are 3, yes 3, closets in this hallway. We painted one up and use it as a pantry, the other is a broom closet and the one at the end of the hall holds our all the extras... extra diapers, t.p., towels, and the tools I use ALL the time. Oh and now Peyton asks to "play" with "her" screwdriver in the closet haha! So I was thinking that the closet and drawers would be painted mostly white but I'd tape off a tree or something so that the wood grain still popped through. Then it might be too busy with stripes for sure...  Hmmmm....
 
Maybe I'll add some stripes like I did in my downstairs bathroom?
What do you think? To stripe or not to stripe? That is the question....

Thanks for reading!

A Little Boys Room: Evan's Nursery

My sons nursery was a pretty big project. What better gift to give him, but his own cozy and comfy nursery, besides the gift of life itself right! This room took lots of nesting skills. Let me tell ya. I did a bit of research on what I wanted for the accent wall before just throwing up some tape and paint. I went back and forth with so many ideas. Some may call that crazy, but with my love for decor it was pure heaven! Here is the final result. Evan has been in his own room now for about 4 months and now that he is crawling at 7 months old, he aims for his room to play! I love that!
EVAN'S NURSERY
Before - Cramped Guest Room

AFTER
Baby Evan's Nursery


Colorful squares, blue black out curtains, silver window hardware, a comfy spot to sit and nurse, and a DIY dresser...oh and space ships...What more could a cute little boy want? We love it in here and hang out in here as a family because right now its the only room on our upper level with carpet. What do you think about Evans little place to chill and rest? We're hoping he loves it 5 years from now just as much as we do!

The Room Breakdown....
The curtains were purchased from Ikea (2 panels for $20).
The crib is from Walmart but they no longer sell it.
Bedding is from Target. It was a clearance set for $28
The rug was from Lowes $30ish
The mini table and chairs are from Ikea. $7 table, $9 chairs
Dresser is a DIY project (paid $10 for the dresser on craigslist)
Rocking chair recliner was from Furniture Row Outlet $200 clearance find
Ceiling Clouds light is from Ikea $19
Curtain hardware Walmart $12 each
Side table by dresser is a garage sale find. It was wood - I painted it and the knobs as well. $3
Amish Star on wall above crib is from Ebay $29
Artwork above dresser is from BabiesRUs $6 each clearance 3 years ago.

HOW TO PAINT THE SQUARES
The first thing you do when you're painting squares or stripes, is measure your wall. For squares, fist decided what size you think would roughly look good. If you're thinking of 12 inch squares devide 12 by the total # of inches for the height of the wall and that will tell you how many squares you can do. This wall is 8 feet high, so thats 96 inches. 96 divided by 12 would be 8 squares. But...then you have to configure in the width of your tape right! YES! So if you're using 2 inch tape, like we did in this room, then each square is actually only 10 inches wide. We decided that 10 inches was way too little. After much thought we went with an odd number and honestly I dont even remember what the size was. We just eye balled it haha! I believe they were 15 inches plus the 2 inch tape on each side, making for 19 inches all together. 
So.... The tape is put up with 2 people. You will want help on this project. While you roll out your tape, use a level to make sure it goes up on the wall straight. Start with your vertical lines first and just hang small  pieces up first at the top of where the vertical lines will start. Stand back and eye ball it and see if it  looks even. If its even then you just pull one long piece of tape down, keeping it level. Repeat this process for teh horizontal stripes. 

To be sure that your paint doesnt seep through use a credit card to make sure you've secured your tape good to the wall by rubbing it along the edge of the tape. Also - I hate blue painters tape and I swear by plain ol good masking tape. I havent tried the green tape yet.
Paint right away and just paint all your colors in each space as you want. Do your 2nd coat quickly, within an hour and after the 2nd coat if it all looks good peel away the tape immediately, while the paint is wet. Its easier this way because then the paint doesnt have time to dry to the tape and possibly peel away with the tape when you pull it off. 
Stand back and admire your hard work. This took Dan and I about 4 hours total.

Friday, May 13, 2011

Entry Wall Transformation: Picture Gallery

Our entry wall was basically empty. We had a closet that held all our shoes and coats. The door was always shut because it was an ugly site inside. You know how closets can get, when there is a door to hide everything right!? The wall to the left of the front door only had one picture on it. I'm not a fan of a ton of things on the wall but I love family photos and personalized art by my daughter on the wall. I decided to spray paint a bunch of mismatched frames I had and get going on my Gallery wall. While I was at it I also made over our mini entry closet. It's now a mini mudroom that you can see here.

I love to come in the front door and see this wall now. I hope you like it too. Maybe it will inspire you to pull out all your mismatched frames and recycle them up a bit. Eventually Id love to frame a little world map about 4x7 size and put pins on the places Dan and I have traveled to in a shadow box frame. I want this wall to be really personalized and I hope it will inspire our family to love each other more every time we see it!
ENTRY WALL BEFORE


AFTER


 The frame with the polka dot paper (wrapping paper from Target) is from my Recycled Love Letters store. It's a dry erase board. Peyton has proudly left her mark on it. I've already swapped out the background too.

How it All Happened....

 I had a bunch of old frames. I love chunky frames with dimension. I bought a can of Dover White gloss spray paint from Walmart for just under $5. It took one whole can of paint for all these frames. Not bad. The only frame I didnt spray was this next one...
 I loved the front, but I LOVED the back even more...and Ive had a few photo strips I've been wanting to put up. Somehow my mind came up with this idea. I'm sure its been done before but I've never seen it yet. I was pretty proud of this idea!
 This little mirror was purchased at a thrift store for around .25 cents! Its just adorable. Our thrift store does 75% off days. Check to see if your local thrift store does. If you're in Spokane, I'm referring to Christian Thrift Stores off Maple St

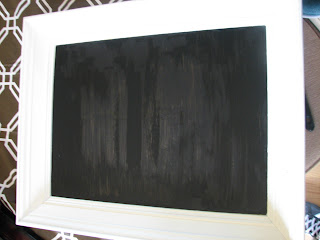
 This frame had a horrible piece of art in it. I always thought Id just bust out the picture and use the frame. Better yet though... CHALK BOARD PAINT! I'm a bit obsessed with it.
 This was the first coat - I actually painted a coat of plain black paint I had left over from my stair rails I had to paint up last summer. Its much cheaper than chalk paint so why waist the first coat on chalk paint if you have left over black or any dark paint would do.After it was nearly dry I painted 1 heavy coat of chalk board paint. All the frames were painted the same color. 

I hope this project inspires you. Thanks for reading!